
Welcome to our beginner’s guide to the Shopify admin area. This blog post covers the key areas of the Shopify back-end, what each section does, and what you need to configure.
We’ve split this into the following areas:
- The Main Shopify Sections
- Key Settings
- Additional Settings
- FAQ
- Marketing Tips & Tricks
- Further Information
Let’s go.
1. The Main Shopify Sections
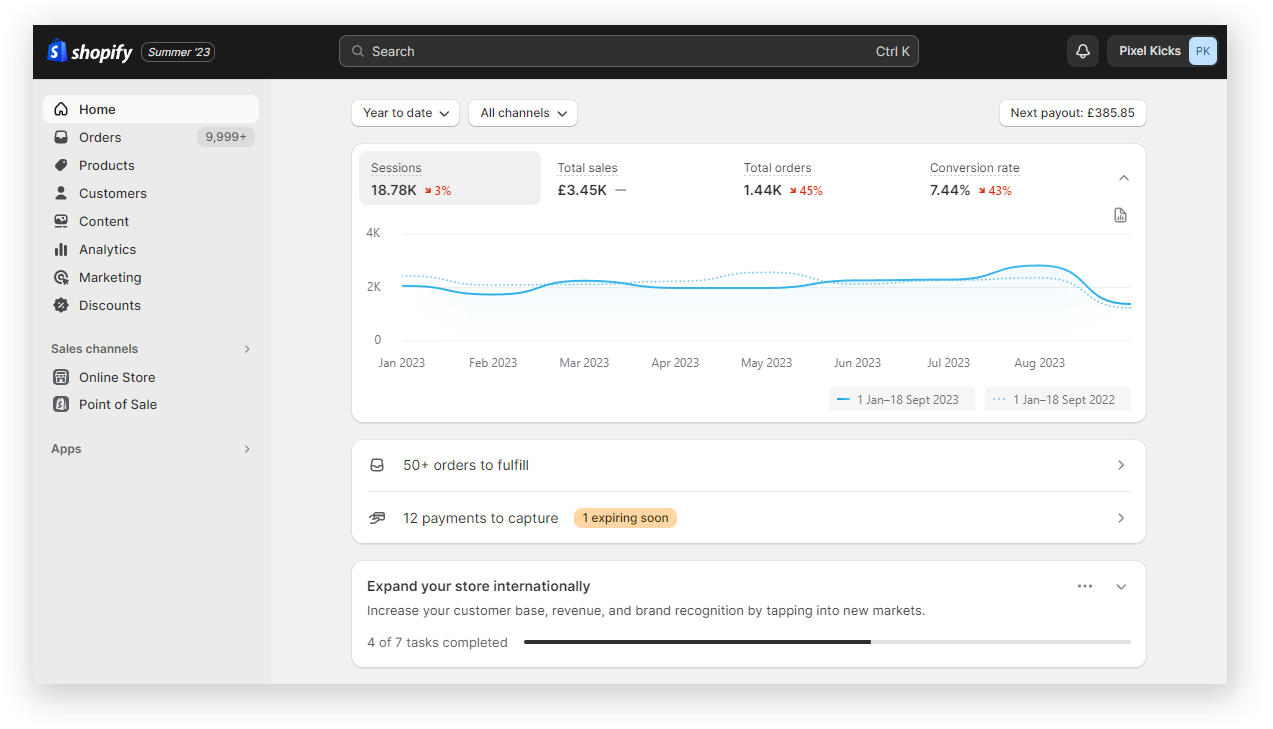
When you log into the administration area of Shopify, these are the main navigation links that you will see on the left hand side, which you’ll use frequently.
- Orders
- Products
- Customers
- Content
- Analytics
- Marketing
- Discounts
- Online Store
- Point of Sale
🛒 Orders
Any orders that your Shopify store receives will instantly appear in this section. You can also create orders manually that might have been made outside of Shopify or to send your customers invoices – these will appear in the Draft orders section.
Viewing an individual order
Clicking into an order allows you to see a detailed breakdown of their information along with performing various actions such as:
- View the order status
- Refunding & Returning options
- View tracking information
- Printing packing slips
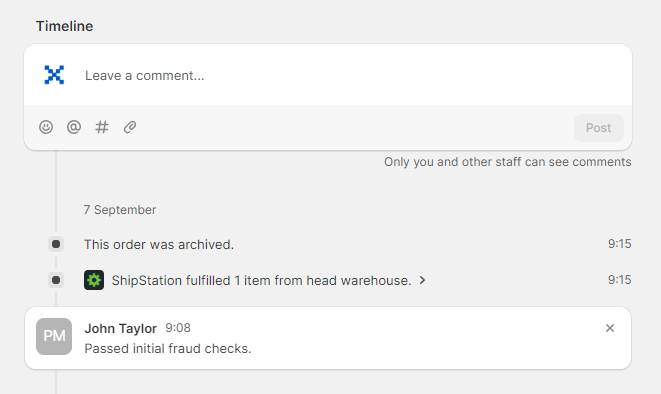
- Adding comments
You can also see a useful “Conversion summary” that provides some information about the customer and how many times they have visited your store before purchasing.
Shipping Labels
Any shipping labels you purchase on Shopify will appear here. Print, reprint, or void your labels and track deliveries in bulk. This uses Shopify Shipping where you will need to connect your Shopify accounts with their shipping carriers.
Abandoned Checkouts
- The “Abandoned checkouts” section allows you to see potential orders that were abandoned at a particular stage. If the customer entered the information at checkout but didn’t go on to purchase the product in full, then you can see their information here. Common abandoned rates can often be around 65% to 75%, so it shouldn’t be surprising to see a large amount here.
- By default, Shopify sends emails to customers that didn’t complete their order – 10 hours later.
- You can also manually send emails at a later date, or export this information to another platform.
📌 Useful Tip
- When creating a manual order, you have the ability to add custom items that don’t exist as products in your store.
- This is useful to let you quickly add an order without having to first create the product, or it could be a unique type of order where you just need to write a different description.
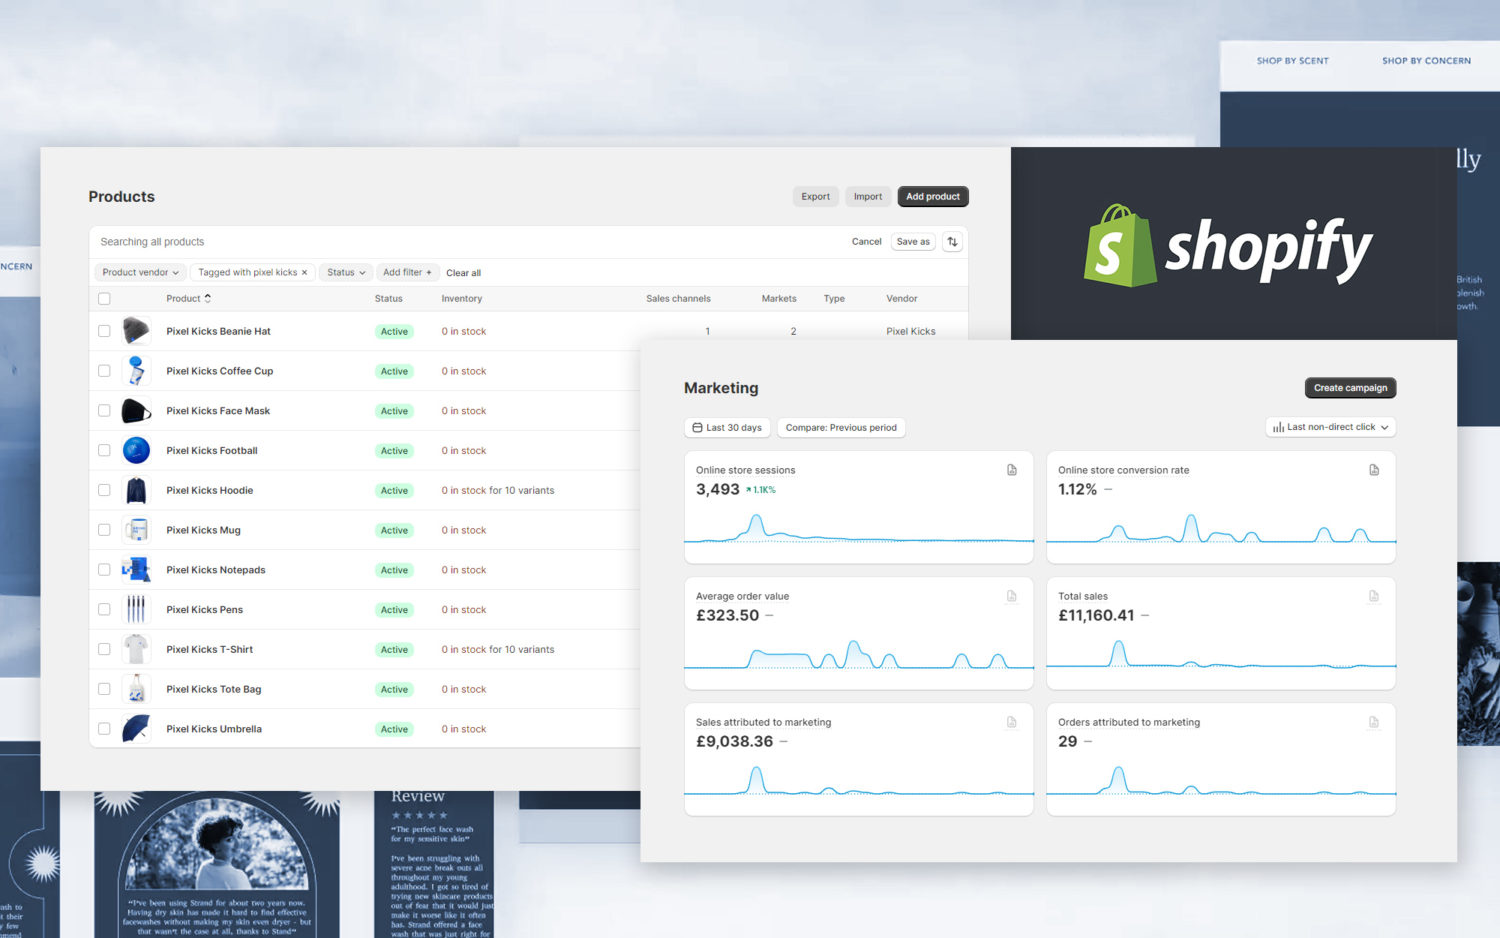
🛒 Products
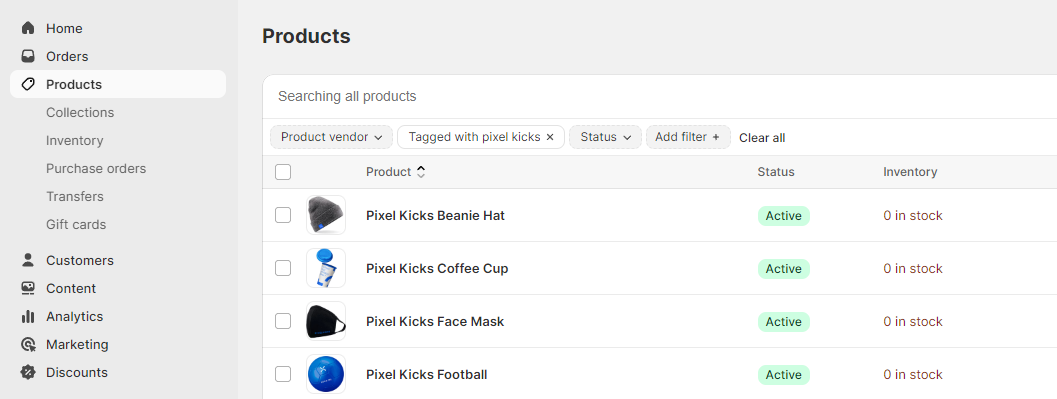
This section lets you view, add, update, and organise all of your products and variants in the Shopify admin. When adding or updating a product, you can make the product available to one or more of your sales channels. Your sales channels can consist of your main Shopify online store, but also Facebook & Instagram, Google, Shop and Point of Sale.
Certain specialised fields of information for your products can be edited by using the “Metafields” section.
📌 Useful Tip
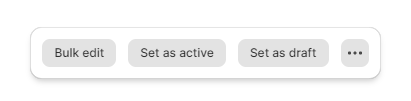
You may wish to edit multiple products at once to save time.
- In order to do this, simply tick your required products (or tick the option at the top to select them all).
- Then at the bottom of the screen you’ll see a menu with a few options – “Bulk edit | Set as active | Set as draft | More (…)”.
- You can use these to apply common actions to many products at once.
The “Bulk edit” in particular is useful as it brings a tabular view (similar to a spreadsheet) that lets you edit data much quicker than if you were to edit products individually.
Key Areas:
- Collections: Here you can configure the “Collections” which are essentially different categories of your products. You can create as many as you wish to help organise your content.
- Inventory: Control your stock levels in this section by updating the availability of products at all or different locations. You can also export or import stock levels here.
- Transfers: If required, you can add details of forthcoming stock supplies here, which can help to inform customers when certain products might be back in stock.
Gift Cards: Here you can create gift card based products, which can be used as payment toward future orders from your store.
🛒 Customers
Here you can view all of your customer information, including name, email address, location and order history. You can also see if they are subscribed to email communications too.
This is an extremely powerful area of Shopify as you can create customer segments based on order frequency, product types, location, abandoned checkouts and more. This can help you group customers who share similar interests or characteristics together.
Customer information can also be imported from other platforms and also exported for use in 3rd party mailing platforms like Mailchimp and Klaviyo.
📌 Useful Tip
- You can leave comments and notes against each customer that other admins/staff can see. This can be useful if you’ve had an email or phone conversation with a customer and want to write down what was discussed.
- You can also reset customer passwords by clicking the “More actions” menu when viewing an individual customer.
🛒 Content
In this section you can upload and manage files, as well as configure additional metaobjects.
Key Areas:
Files:
- This is where you can upload and manage file uploads, including images, videos and certain files that you might want to make available for customers to download.
- Importantly you can add “Alt text” for images here, as well as setting a “focal point” that means this area of the image will always appear in frame
Metaobjects:
- Metaobjects are a powerful way to add custom, multi-field objects to your store. You can use them to display unique information like cart upsells, size guides, or product highlights.
🛒 Analytics
This section includes a dashboard with key performance metrics, as well as detailed reports on sales, customers, and products. You can view data by day, week, month, year or a custom range by clicking the calendar icon towards the top left.
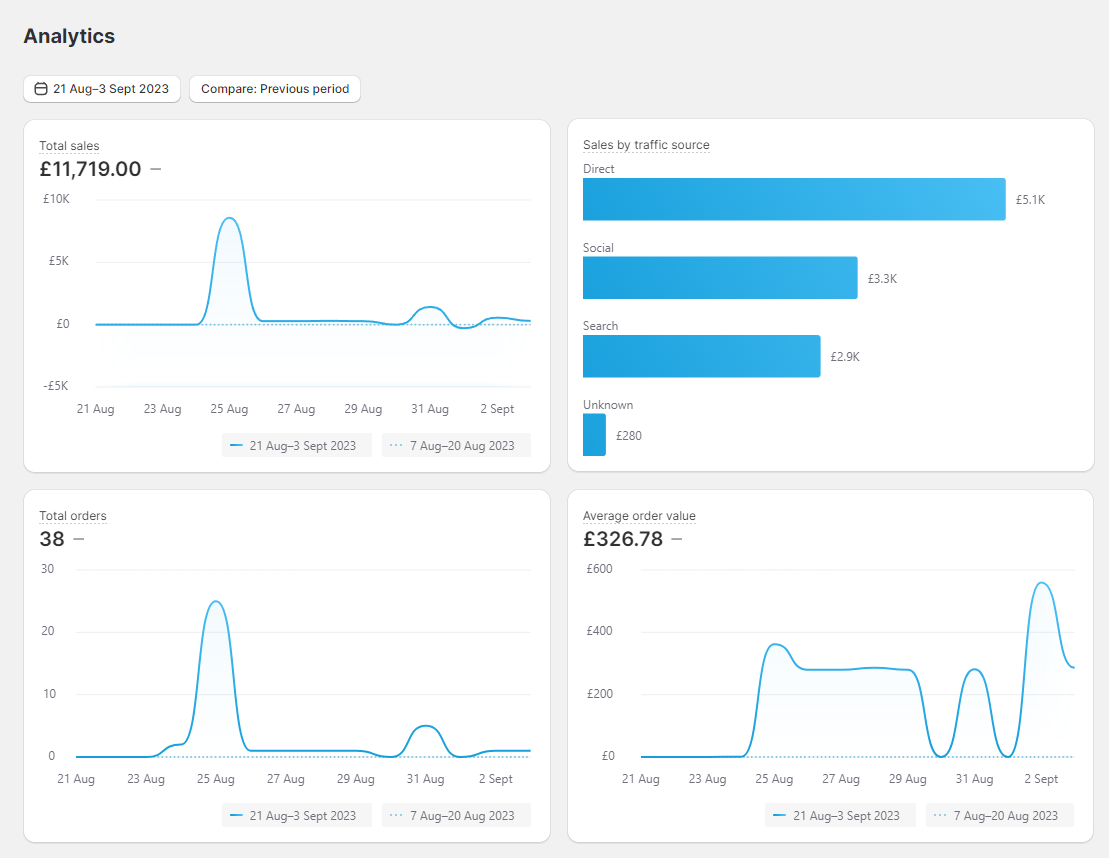
Key Areas:
- Analytics: This is the main section that shows visual graphs as shown above, via a series of different widgets.
- Reports: This section shows a selection of different reports based on certain information. The types of reports you can see will depend on the Shopify plan you’re on.
- Live View: See real-time data of customers on your website right now.
📌 Useful Tip
- Use the “Live View” to get a visual view of how many visitors are using the website in real-time.
- You can see the top locations, total number of visitors, current sales and more. Be careful though, as your sales start to grow, this can become quite addictive!
🛒 Marketing
Marketing is the most important part of running any business, as it doesn’t matter how good your products or services are – if no-one knows about them, they can’t buy them!
In this section you can create and manage marketing campaigns that run on Facebook, Google Shopping, emails and more. You can view the performance of campaigns alongside looking at your best performing channels.
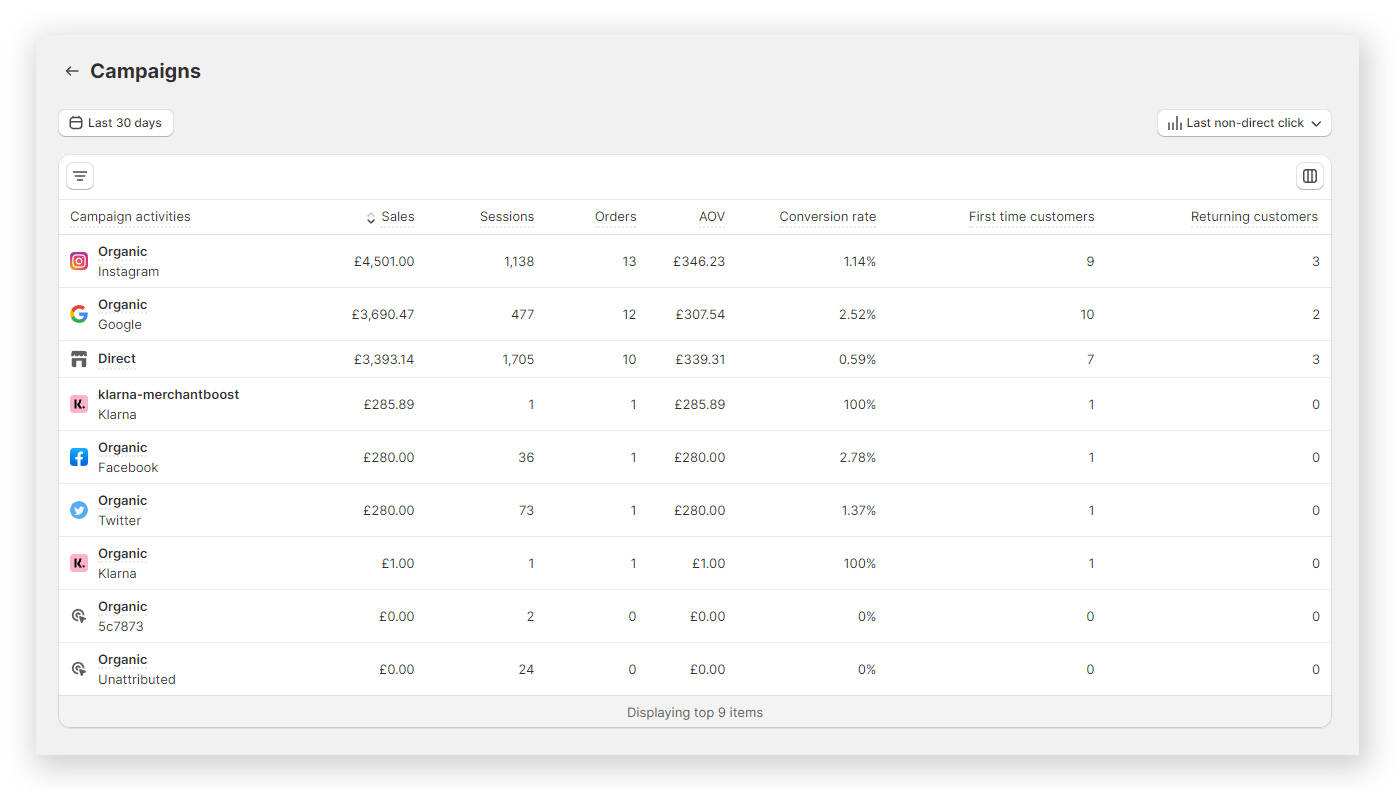
Key Areas:
- Campaigns: View existing campaign performance here, consisting of sales, sessions, orders, conversion rates and more.
- Automations: Marketing automations enable you to automatically send emails to customers when certain events happen.
Some of the types of automations include:
- Welcome new subscriber
- First purchase upsell
- Customer winback
- Abandoned product browse
- Abandoned cart
- Abandoned checkout
📌 Useful Tip
- Shopify Email is a free app that lets you send 10,000 emails per month for free. You can easily create branded emails with the simple drag-and-drop editor, and their range of sales-focused templates are excellent.
- Shopify Flow is also a great app that allows you to create custom automations, with even more pre-built templates. It’s free on Shopify Advanced and Plus plans though.
🛒 Discounts
Offering discounts can be a powerful marketing strategy for your Shopify store. To offer discounts, you can create discount codes, set up automatic discounts, or set sale prices for individual products.
The types of discounts available to use are:
- Amount off products (Product discount)
- Amount off order (Order discount)
- Buy X get Y (Product discount)
- Free shipping (Shipping discount)
📌 Useful Tip
- When setting up your discount code, you have the option to directly share a link to any social platform or email.
- When someone clicks the link, the discount code will be automatically applied at checkout, which makes for a seamless user experience and saves the customer from having to manually type the code in at checkout.
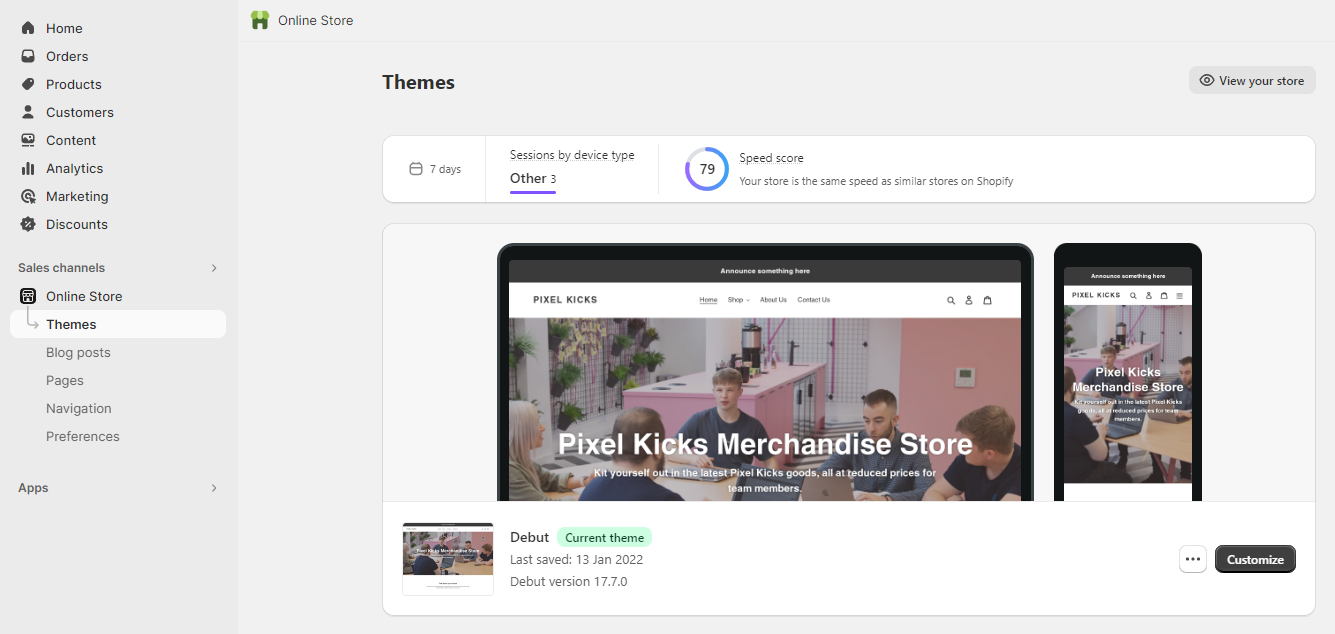
🛒 Online Store
This is the main section where all of the main theme settings and preferences are stored, along with the liquid code for the website itself. Clicking “Customize” takes you to the main page editor where you can edit the content for products, collections pages and other key areas of the website.
Key Areas:
Online Store > Customize:
- Edit your page and product templates and content here by using the dropdown menu at the top of the page.
- On the left hand side you’ll see a guide to each section, whereas in the middle you’ll see a preview of the page itself.
- The right hand column will be the actual content that you enter, eg text, images etc.
[…] > Edit Code:
Unless you know what you’re doing it’s best to leave this section alone, but here is where all of the website code can be edited. Types of code are separated in the following common folders:
- Layout
- Templates
- Sections
- Snippets
- Config
- Assets
- Locales
Liquid files are Shopify’s default template language which consist of tags, filters and objects. The files in this section will commonly be Liquid or JSON files, though in the Assets folder you’ll see CSS, JS and image files amongst others.
[…] > Edit default theme content:
- Here you can edit the common words and phrases that your website uses.
- Most of the information here should be left as default, but you can change any of the values as per your preference.
Theme Library: See previous versions of your website theme here.
You can also edit Blog Posts, individual Pages and the main website Navigation menus here as well as editing some default Preferences for your site.
Blog Posts:
- Create new blog posts for your site here, and set them to “Visible” to publish them straight away by making it “Visible” or leave them set as “Hidden” until you’re ready.
- As well as writing the main blog post itself you can choose a featured image, add an excerpt (short preview of the post) and customise the Page Title, Description and URL handle by clicking “Edit website SEO” at the bottom of the page.
- By default, all blog posts will be set to the same “Blog” category, but you can create new categories by clicking “Manage blogs” at the top right. For example you could create new categories such as “News”, “Fun”, “Guides” etc.
Pages:
- Edit your sites default pages here, which will typically be your general information non product pages such as About, Privacy Policy, Shipping etc.
Navigation:
- Under “Menus” you can configure your site navigation. Typically you’ll have a “Main Menu”, “Footer Menu”, and possibly others.
- Simply click into them to edit them and add new pages or re-order.
Preferences:
- Edit your default Page Title and Meta Description here, as well as choosing your default social sharing image.
- For tracking purposes you can also connect your Google Analytics and Facebook Pixel accounts here.
- Finally you can choose your preferred customer privacy settings, add a password to your site, or choose whether to use Google reCAPTCHA to cut down on spam.
🛒 Point of Sale
This section helps with selling your products in person. Shopify POS syncs with Shopify to track your orders and inventory across your retail locations, online store, and other active sales channels. You’ll need to purchase additional hardware to allow this.
2. Key Settings:
⚙️ Store Details
Find this in “Settings > Store Details”:
Configure the general store settings for your website, including store name, phone number, contact email, billing information and more.
⚙️ Payments
Find this in “Settings > Payments”:
Configure payment providers here. Choose your available payment methods and add additional ones in the future.
⚙️ Checkout Options
Find this in “Settings > Checkout”:
Configure additional checkout options in this section including contact methods, required customer information, order processing options, marketing & checkout abandonment options and more.
There are also various checkout styling settings that can be changed, though the Shopify checkout structure can’t be changed unless you’re on the highest Shopify Advanced plan.
⚙️ Shipping & Delivery
Find this in “Settings > Shipping & Delivery”:
Manage your shipping rates and options here. Click “Manage” under “General shipping rates” to configure the main options. You can also create custom shipping rates.
⚙️ SEO Settings
Find this in “Apps > SEO”:
We generally recommend installing the Avada SEO app to configure SEO information across your Shopify website, as well as offering speed enhancements. There are a huge amount of settings that be configured here, and the most common settings include:
- Site speed-up
- Meta Titles and Meta Descriptions for your products and collections
- Local business settings
- Social network information
3. Additional Settings:
⚙️ Email Notifications
Find this in “Settings > Notifications”:
You can edit all of the Shopify ecommerce email notifications here, including but not limited to the following:
- Order confirmation
- Order edited
- Order cancelled
- Order refund
- Abandoned checkout
- Shipping confirmation
- Delivered
- + more.
Click into an email to view it, and click “Edit code” at the top right to edit the information in the email. You can edit the text information in each email, but be careful not to edit the Shopify liquid code incorrectly however as it could cause the email to fail.
⚙️ VAT Settings
Find this in “Settings> Taxes and duties”:
Configure your sales tax information, which for UK sellers will be whether you are VAT registered or not and therefore have to charge VAT on all your sales.
⚙️ Stock Locations
Find this in “Settings > Locations”:
You can manage the places you stock inventory, fulfil orders, and sell products in this section. Shopify allows up to 1000 different locations on all plans up to Advanced.
⚙️ Brand
Find this in “Settings > Brand”:
You can configure your brand logos and colours here that may be used across social media applications. Information that is configured within certain apps may override this section.
4. FAQ
Here are some common questions you might have about your website and how to manage everything.
📋 Shopify General
Q: How do I edit the content on pages & products?
A: Go to “Online Store > Customize”, and then select your page from the dropdown menu at the top.
Q: Can I schedule products to go live at a certain date & time?
A: Yes. This can be done by clicking the “Calendar” icon next to “Online Store” Publishing block, to select a specific time.
Q: How do I bulk edit products?
A: This can be done by selecting multiple products at the same time in the “Products” section, then clicking “Bulk Edit” at the bottom of the page.
Q: Is it possible to change the URL of a product?
A: Yes, this can be done by going into a product and scrolling down the “Search engine listing” section at the bottom and clicking “Edit”. You can then edit the “URL handle” at the bottom. This is useful if you’ve mistakenly typed a product name before saving it, or if you want to add additional keywords in the URL.
It’s not advisable to change URLs too often, but Shopify does give you the option of creating a “URL redirect” which is extremely important to make sure you select.
Q: Are there any ways to do things faster in Shopify admin?
A: A useful tip is try using keyboard shortcuts to navigate around. Try pressing the “?” character on your keyboard to bring up a useful view of all the shortcuts available.
Q: Can I export my Shopify Analytics information?
A: You can export individual reports such as “Sessions by location”, or “Net sales” by going to Analytics > Reports. You can also use 3rd party platforms such as Databox to get a useful visual view of Shopify data.
Q: Does Shopify allow customers to subscribe to our products?
A: This is possible via apps such as Recharge Subscriptions, where customers can subscribe to certain packages or products that you set up. This typically works well for food & consumable related stores.
Q: Can we customise the checkout pages?
A: This is only possible on the highest tier of Shopify subscription – Shopify Plus which comes with a minimum $2000 per month cost. This comes with a few more advanced features along with reduced commission per sale.
5. Marketing Tips & Tricks
Here’s a few great marketing tactics that will help kickstart your new business.
- Generate new reviews on a regular basis, on both Google and a respected 3rd party platform like Trustpilot or Reviews.io. Reviews are important to convince customers that they are buying from a reputable website.
- Create a referral program to give customers an incentive to refer others.
- Create a series of low-value voucher codes and submit them to the common voucher/discount websites. Name them with keyword-rich words for increased SEO.
- If you’re constantly seeing common cart or checkout abandonments at a certain price, eg £150 or more, consider offering some sort of incentive such as discounts, free gifts etc, to try and get customers to go through with the sale.
- Be as descriptive as you can whilst writing product descriptions. Ask yourself what makes your business stand out from the crowd, and bring this into your copywriting.
- Consider adding a live-chat option to engage with customers who might want an answer to their question straight away. This can often be the difference between getting a sale or not.
6. Further information:
For further information & additional resources on Shopify, we recommend the following links:
Step-By-Step Shopify Tutorial For Beginners
The Ultimate Beginner’s Guide to Ecommerce SEO
You can also find our more about our own Shopify services here.
MORE LIKE THIS
VIEW ALLPixel Kicks joins PushON Commerce to accelerate growth
11th November 2025
Shopify for B2B Ecommerce: Features, pricing, and why it works
10th August 2025
What do Swiss mountains and project management have in common?
11th February 2025

Building an Accessible Website: Essential Practices for Developers
12th December 2024