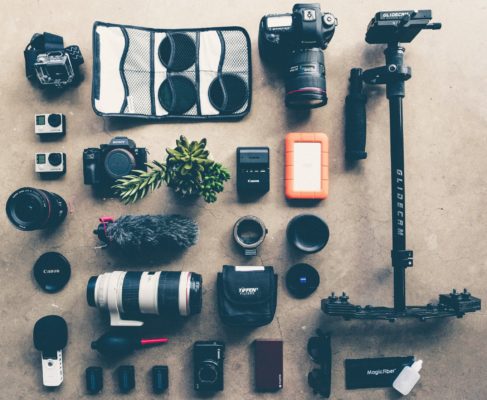
Getting into photography can be a daunting prospect for beginners. There are 101 different cameras to choose from, each with 10 times as many available lenses, and a seemingly unending array of features and settings to get your head around. Many people are also stopped in their tracks by the costs of photography, which are admittedly eye-watering to the uninitiated.
All these combined lead many people to simply give up on the journey to becoming a photographer, but today I’m going to share with you the advice I wish I had been given when starting out that will help get you out there capturing the world how you see it, and hopefully getting paid to do so!
While I’ve arranged these tips in order as best I can, everyone’s experience will be different. It is best therefore to take them all on board and use this article as a platform to launch your own learning and see where your journey takes you.
#1 – Getting a Camera
Now this may seem like the obvious place to start out in photography but for many it is also the first major hurdle they face. Nice cameras aren’t cheap, it’s as simple as that. There are ways around it though and if buying a dedicated camera simply isn’t possible for you right now you can try learning the basics of photography on your phone!
If you are in a position to buy your first camera there are two schools of thought you can go down: buy nice or buy twice. Both have their merits, and in the long run both probably cost about the same, but we’ll take a deeper look into each of them.
Buy Nice
Now this is definitely the option for those either with a large budget for their hobbies, or someone looking to make photography their profession. If you have a few thousand pounds to spare then buying nice gives you the option to learn on professional grade equipment and means you won’t have to then be incrementally improving your rig over the span of several years.
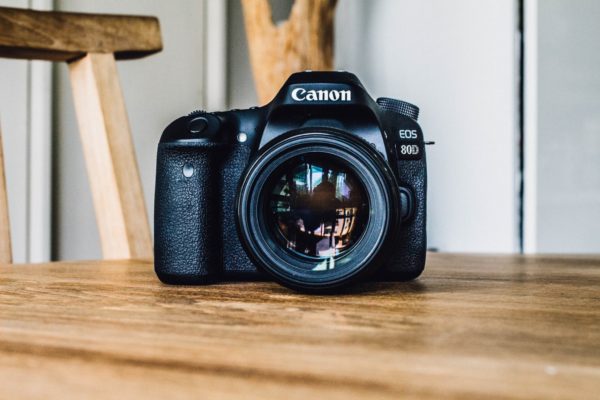
If you are choosing to spend this amount as an amateur then it is vital that you do your research and futureproof your setup as much as possible, you don’t want to have to spend 4 or even 5 figure sums twice because you made a mistake! A good place to start will be with a full frame mirrorless camera like the Sony A9 or Canon’s new EOS R5.
With a nice camera body in your hands, you then want to invest in a matching lens. When starting out there is no need to go crazy and buy every lens you can, but it is important to invest in quality glass. Sony, Canon and Nikon all have their own line of professional lenses and to get the best out of your expensive new camera, it’s best practise to marry it with lenses by the same manufacturer.
Buy Twice
In many other cases buying twice is seen as the lesser option, but in photography it can be an excellent way to get into the craft early and begin honing your skills so that when you do build up to the expensive end of the gear spectrum you will already be at a level to use those cameras as they were intended.
One of the best ways to start out is to buy second hand, and learn on cropped sensor DSLRs. The advantage of buying second hand is that you get considerably more for your money than buying retail.
Take the example of this Canon 4000D available at Currys. For £420 you are getting Canon’s most basic camera, a basic kit lens, and an entry level portrait lens, all of which you will probably replace within your first year of shooting. You could instead spend the £420 on a Canon 70D from a site like mpb.com, which is a far superior camera right at the top end of Canon’s amateur line and just below their professional series. While it might be a few years older and already loved by another owner, the technology inside it still far outstrips the new entry level cameras and so is a much wiser way to spend your money.
When trying to spend your money as wisely as possible it is important to invest in the lenses and not in the camera body. New shooters often get drawn in to wanting bigger and flashier cameras, and “long range” lenses. Don’t worry, we’ve all been there and done it but hopefully after reading this you will avoid the temptation.
Professional wide aperture (f2.8) lenses hold their value like nothing else in a photographer’s arsenal, and as a result are one of the more expensive items that every shooter should aim to get their hands on. Instead of wasting money on the cheaper kit lenses, save up and look at getting your hands on “fast” lenses from the likes of Tamron and Sigma. They make excellent glass that is compatible with most of the big names like Canon and Nikon, and for a fraction of the price.
Buying second hand does mean that slowly working your way up to professional grade equipment is much easier. As the equipment has already depreciated from its retail price the loss you suffer with each new camera body or lens is greatly reduced and so makes the art much more affordable.
Which brand should I buy and with what features?
Unfortunately I can’t tell you what to buy as it depends entirely on the style of shooting you want to do, your budget and any gear that you might already have. The divide between Canon and Nikon shooters is as entrenched as the divide between Apple and Android users, but both brands offer their own versions of the same products and so starting your path with either brand is okay. If in the future you decide to move to mirrorless technology the chances are you will have to replace all of your gear to match, and so will be able to finally change your go to brand to the likes of Sony.
What is important to look for in your camera is a decent resolution sensor and as wide an autofocus area as possible. Megapixels aren’t everything, and buying a super high resolution camera at the expense of other features is a bad idea, but ensuring your camera has at least 20MP will mean that any photos you take can be cropped or blown up afterwards, which will help you correct mistakes in your composition or compensate for a lack of a telephoto lens.
Possibly the most important feature on a camera that will help you learn photography is a wide autofocus area. It is rare that you will focus solely on a subject smack bang in the middle of your frame, and so instead need to be able to move your focus points over to the sides in order to compose your photos more professionally. Looking back to the Canon 4000D and 70D comparison, the 4000D has a total of 9 selectable AF points whereas the 70D has 19, meaning the user can select the part of the frame to focus on much more accurately.
With your lenses, you should aim to get “the Holy Trinity” for your chosen brand. This consists of a 16-35mm wide angle (short range), a 24-70mm mid range and a 70-200mm telephoto (long range) lens, all with a wide aperture of f2.8
#2 – Learn the basics, and get out of Auto as soon as possible!
The auto mode on cameras is both a blessing and a curse. It allows new users to get excited about photography and keeps things simple when learning how to properly compose a photo, but it also takes all control away from the shooter in regards to the light, colours, and style of the image.
The easiest way to learn photography is to follow the example of experts who are already well established within the community. Youtube has made beginner lessons so easily accessible that paid courses are totally unnecessary for those just starting out. A few of my favourites are:
Peter McKinnon
PM’s freeform style and lively vlogs often contrast with his love for all things dark and moody, but as a highly accomplished product and landscape photographer his knowledge is well worth taking on board. He does regular tutorial videos around taking photos themselves, but also how to edit using Adobe programs.
Jared Polin
Jared Polin is an acquired taste, but he knows everything; and his technical reviews are invaluable when looking to buy high end camera gear. He is totally unapologetic and only gives his honest feedback even if it is a product from a brand that he normally likes. His outdoor and sports photography is also second to none, and allows him to really push his cameras that he reviews.
Chris Winter
Chris Winter is something of a smaller channel, but his overviews, reviews and hands on walkthroughs with lower end cameras are a valuable resource for those looking to make their earlier purchases. He has slowed down the rate at which he produces videos but his archive on older cameras is still there to help anyone looking at buying second hand.
F Stoppers
F Stoppers are one of the OG camera channels on Youtube. These guys have been in the community for decades and have likely had hands on with every piece of equipment out there. If there is an obscure item you want clarification on, or want to know how to minutely adjust the white balance in your camera to set the correct warmth tone then F Stoppers will more than likely have a video on it.
What should I be learning first?
The single most important skill to learn about photography is the exposure triangle, balancing shutter speed, aperture width and ISO to create a bright image that’s free of motion blur and has the subject in clear focus against the background.
While mastering your camera in manual, you can also work on your composition. The first basic skill to learn is the rule of thirds which helps you to create a more interactive image for your viewer, instead of simply being “a picture of something” or a “snapshot”.
Both of these skills combined will form the basis for improving your images, and with practice will become second nature. If you don’t yet have your camera, you can still train these skills using the camera on your phone! Most modern smartphones have at least an acceptable camera, and some even feature a pro mode that allows you to alter settings like shutter speed and ISO. Take a look in your settings, and see if you can add a rule of thirds grid to your display, and try taking some new photos right away.
#3 – Start Editing Your Photos
There are many out there who think that editing a photo is wrong, and that you should only ever display the image as the camera recorded it. This is an admirable way to conduct your photography, but it lacks any flair. The vast majority of professionals edit their photos using tools like Adobe Photoshop and Lightroom either to simply colour correct the image to resemble real life a little better, or to totally change the nature of the photo and create a stunning contemporary image.

Whether you edit for subtle changes or total mayhem it is important to get to grips with the software early on, as it is often daunting to new users and takes time to fully master it. Again, Youtube is your friend, and there are thousands of tutorial videos out there detailing the basics of using Adobe’s programs and going on all the way to adding mountains into deserts or creating striking portraits.

If you’re new to Photoshop and want to try learning some new effects then I recommend taking a look at Creative Salek on Youtube, who does very detailed and easy to follow walkthroughs on simple but striking effects.
Shoot in RAW
When you first get your camera it will more than likely be set to save in JPEG format, which is by far the most common image format you will have seen. You should imagine a JPEG as a flat image, like a photo printed out in your hand.
Where RAW formats differ from this is that they preserve every tiny fractional bit of information captured by the camera’s sensor and make it all available to you in the editing process. In Lightroom for example, you can take an almost pitch black and totally underexposed image and simply lift the brightness to reveal the detail preserved by the RAW file. Shooting in RAW is almost like going back in time, and changing the exposure of your image before you take it.

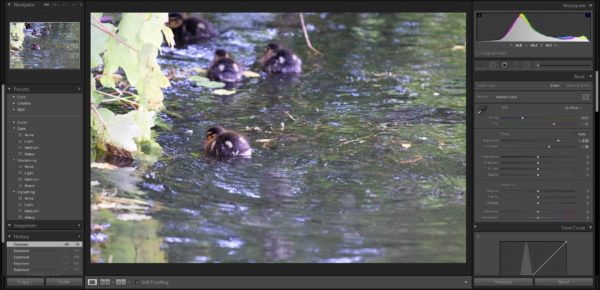
This is the exact same file, but thanks to the RAW format we can raise the exposure without damaging the image.
Even if you don’t have your camera yet most smartphones have the option to save images in RAW format, and free apps like Snapseed can process these files. This is a really good way to introduce yourself to editing your images and is more than adequate for social media photos!
#4 – Show Off!
So you’ve got your camera, you’re well on the way to mastering Photoshop and you’ve got a nice little collection of images building up; what should you do with them? Show off your work as much as possible.
Social media and the wider web both provide an amazing platform to get your work out there being seen! The most popular apps to use are Instagram, Pinterest and even Flickr, and these all allow you to build up a following and get people interested in your work. But why should you show off even from the start?
Putting your work into a public space starts conversations, and will help you to connect with like minded people all over the world. Seeing your work next to seasoned experts will also inspire you to get out and practise, and push your work to new heights, so that before you know it you’re on their level with a whole host of new skills under your belt.
Having your work on show will also bring you new opportunities. One of the hardest things about starting out is finding interesting subjects or locations to shoot. Having your portfolio easily accessible means that people can see your images if you ask to work with them, or they may even contact you asking for a shoot! These messages won’t just appear however, and you’ll need to push yourself to try new things as often as possible, asking friends to model for you or even just going out and getting lost exploring your local area and shooting what you see.
#5 – A Few Personal Recommendations
All of the above are great ways to help just about anyone get going with photography. I’d also like to add a few of the little tricks I’ve learned that have helped me personally delve further into the world of photography.
Always, always ALWAYS have your camera on you.
There are so many times where some of the best shots you take are the ones you nearly miss. Whether you’re walking to work and witness a demonstration, driving past a picturesque landscape or just on holiday wanting to catch some memories, having your camera on you good to go with a mid range lens and a full battery will ensure you never miss one again. There is a skill to getting your camera out at warp speed, but with practise you’ll get quite good at it and when you master the manual modes you’ll have your exposure dialled in just as quickly!
Save inspiration on your SD card.
If you’re doing a planned shoot and have a style of photo you’d like to replicate then saving some images to the top of your SD card will make referencing them so much quicker, and the model won’t even be able to tell you’re doing it! Simply hit the playback button, then navigate to the right to get to the start of the photoreel, where your inspiration will be waiting for you. If you’re running a mirrorless camera this works even better as you don’t even have to take your eye out of the viewfinder!
Keep learning and practise everything.
Even if you feel you’ve mastered a certain kind of photography, keep learning and trying new things. You can never have too much knowledge, and one shooting technique for portraits might cross over to sports or events etc. Even the “masters” of photography are still learning, and fashions change so quickly nowadays that new editing techniques will always be emerging to keep you on your toes.
If you follow all these guidelines, I promise you’ll be out and about capturing the world how you see it in no time. Just make sure you stay confident and if you find a shot that’s too challenging for you, don’t quit, keep trying until you nail it.